Blog

  • 10 Stunning Home Depot Bathroom Tile Ideas to Transform Your Space

    10 Stunning Home Depot Bathroom Tile Ideas to Transform Your Space

    When it comes to transforming your home bathroom, the right tile can make all the difference. I’ve spent countless hours exploring the endless options at Home Depot, and I can tell you firsthand that it’s a treasure trove for anyone looking to elevate their space. From sleek modern designs to classic patterns, the variety is staggering.

    Whether you’re aiming for a spa-like retreat or a bold statement, the right tile can set the tone for your entire bathroom. In this article, I’ll share some of my favorite Home Depot bathroom tile ideas that not only enhance aesthetics but also provide durability and functionality. Let’s dive into the world of tiles and discover how you can turn your bathroom into a stylish oasis.

    Key Takeaways

    • Tile Variety: Home Depot offers a wide range of bathroom tiles, including ceramic, porcelain, natural stone, and glass, catering to different aesthetics and functionality needs.
    • Design Flexibility: Incorporating various color schemes and patterns, from neutral palettes to bold designs, can transform your bathroom’s ambiance and create a personalized retreat.
    • DIY Installation: With the right tools and preparation, DIY tile installation is achievable. Key steps include planning the layout, applying adhesive, and ensuring proper tile alignment.
    • Maintenance Matters: Regular cleaning and long-term care are vital for preserving tile beauty. Simple practices such as using mild detergents and sealing grout can enhance longevity.
    • Cost-Effective Options: Budget-friendly vinyl tiles offer the aesthetic appeal of traditional tiles while providing comfort and easy installation, making them suitable for a variety of remodels.

    Home Depot Bathroom Tile Ideas

    I explored various tile options at Home Depot that can elevate any bathroom aesthetic and functionality. Here’s a list of popular choices:

    • Ceramic Tiles: Available in countless colors and patterns, these tiles offer durability and ease of maintenance. I recommend glossy finishes for a sleek look, while matte options provide a more understated appearance.
    • Porcelain Tiles: Known for their water resistance, these tiles withstand moisture and are perfect for wet areas. I often choose large-format porcelain tiles to create a seamless look with fewer grout lines.
    • Natural Stone Tiles: Choices like marble or slate add a luxurious feel. It’s essential to seal these tiles regularly to maintain their beauty and prevent stains.
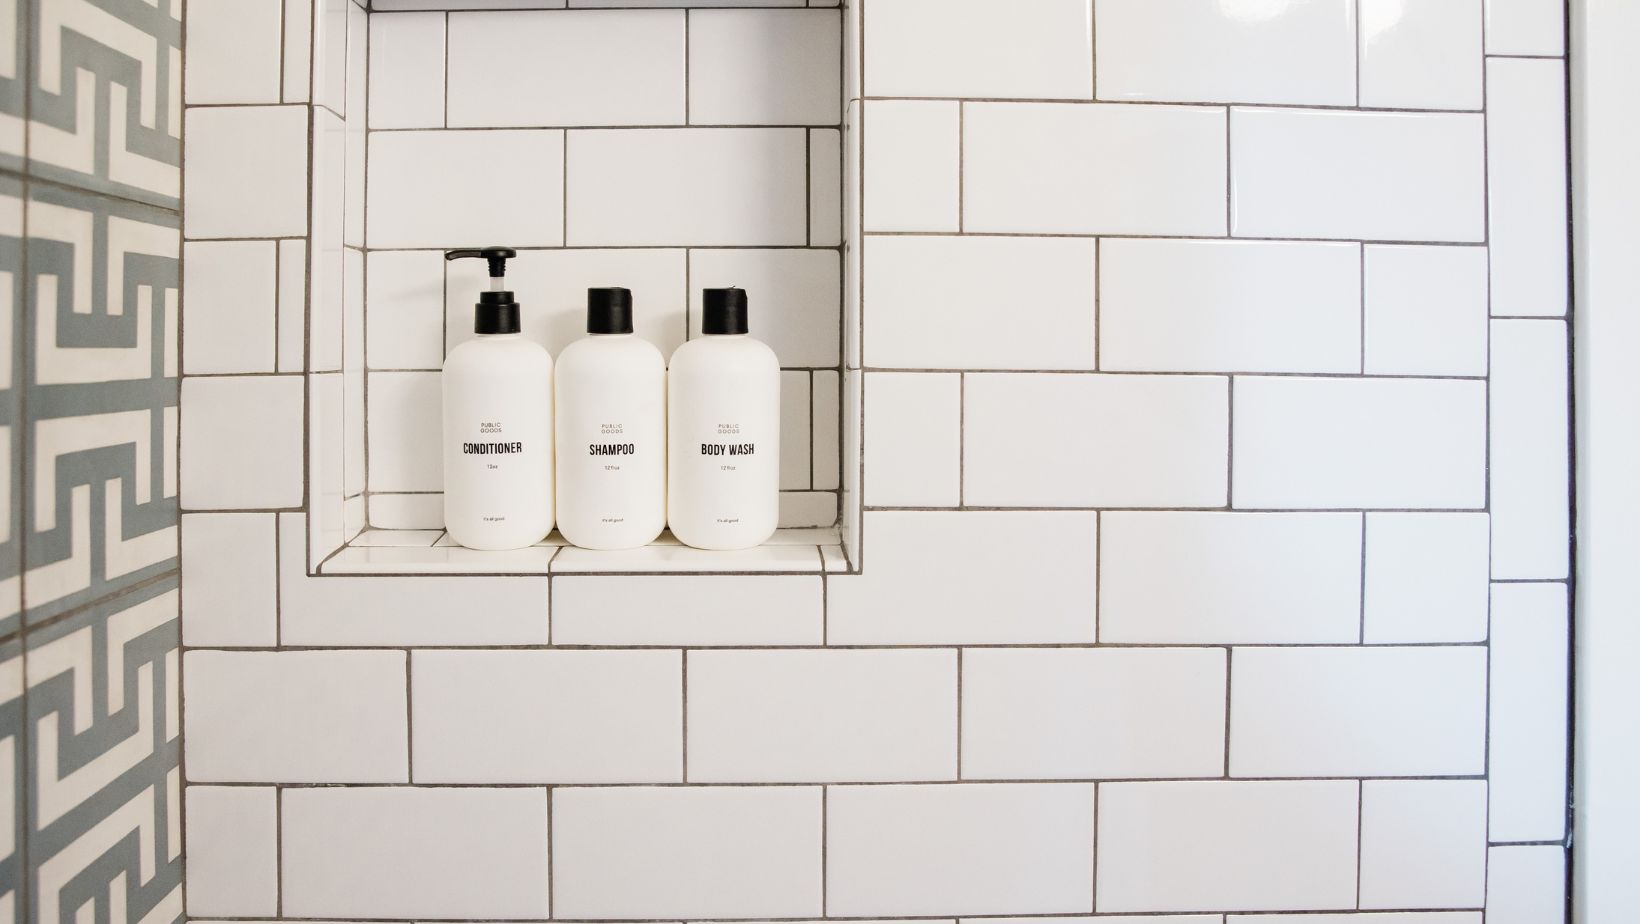
    • Subway Tiles: Classic white or colored subway tiles remain a favorite for backsplashes or shower walls. I find that arranging them in herringbone or stacked patterns brings modern flair to traditional styles.
    • Mosaic Tiles: These small tiles enable creativity in design. I enjoy using them for accents or border designs to add visual interest.
    • Vinyl Tiles: Ideal for budget-conscious remodels, they mimic the appearance of tile but offer comfort underfoot. I often select peel-and-stick options for easy installation.
    • Glass Tiles: Perfect for reflecting light, glass tiles enhance spaces and make them feel more expansive. I usually choose these for shower niches or feature walls.

    These tile ideas from Home Depot transform bathrooms into stylish retreats, making them more inviting and functional.

    Popular Tile Types

    I explored several tile types that stand out for bathroom renovations. Each option delivers unique advantages, making it easier to find the perfect fit for any style.

    Ceramic Tiles

    Ceramic tiles provide excellent durability and easy maintenance. These tiles resist moisture and stains, making them ideal for bathrooms. Various styles, colors, and patterns are available at Home Depot, allowing me to create custom designs that suit my aesthetic preferences. Standard sizes, like 12×12 inches or 18×18 inches, can suit both walls and floors.

    Porcelain Tiles

    Porcelain tiles outperform in water resistance and durability. Their dense composition makes them less susceptible to chipping and cracking. Available in numerous designs, including wood-look and marble finishes, these tiles create an illusion of luxury without extensive upkeep. I appreciate porcelain’s ability to mimic more expensive materials while remaining budget-friendly.

    Glass Tiles

    Glass tiles enhance light and create a sense of space in bathrooms. They come in various colors and finishes, allowing for creative mosaic designs. The reflective quality of glass tiles adds a modern touch while making rooms feel larger and brighter. Maintenance is simple with glass tiles, as they just require regular cleaning to maintain their shine.

    Color Schemes and Patterns

    Choosing the right color scheme and pattern can significantly impact the overall feel of your bathroom. At Home Depot, a variety of options exist to create a stunning, personalized space.

    Neutral Color Palettes

    Neutral color palettes provide a timeless and calming atmosphere. Shades like white, beige, and gray offer versatility, allowing for seamless integration with various decor styles. I often recommend using large-format neutral tiles to create an illusion of space, enhancing a clean and sophisticated look. Pairing neutral tiles with natural wood accents or subtle metallic fixtures can elevate the aesthetic while maintaining a serene vibe. For added texture, consider incorporating patterned or textured neutral tiles, which introduce depth without overwhelming the senses.

    Bold and Vibrant Designs

    Bold and vibrant designs bring energy and personality to a bathroom. Bright colors like teal, red, or mustard yellow can create a striking focal point when used on accent walls or as part of a mosaic design. I find that geometric patterns and large-format colored tiles work well for making a statement, particularly in smaller bathrooms, as they draw the eye and create interest. To balance the vibrancy, it’s effective to pair bold tiles with neutral elements, ensuring a cohesive look. Incorporating colorful accessories, such as towels or artwork, can complement the vibrant tiles while allowing for easy updates in the future.

    DIY Installation Tips

    Installing bathroom tiles can be a rewarding project. With the right tools and materials, anyone can achieve a professional finish.

    Tools and Materials Needed

    1. Tile Cutter: A manual or wet saw for making precise tile cuts.
    2. Trowel: A notched trowel ensures even adhesive application.
    3. Level: Important for checking tile alignment and ensuring a flat surface.
    4. Measuring Tape: Necessary for accurate measurements and planning.
    5. Spacers: Helps maintain uniform gaps between tiles for grout.
    6. Grout Float: For applying and smoothing grout between tiles.
    7. Adhesive: Thin-set mortar or mastic suitable for your chosen tile type.
    8. Grout: Choose a color that complements your tiles; pre-mixed options simplify the process.
    9. Safety Gear: Safety glasses and gloves protect against tile shards and dust.
    1. Prepare the Surface: Ensure the floor or wall is clean, dry, and free of debris. Repair any damage for a smooth base.
    2. Plan Your Layout: Measure and mark your layout, starting from the center and working outward. This helps achieve a balanced look.
    3. Cut Tiles as Needed: Use the tile cutter for edges and corners, ensuring precise fits.
    4. Apply Adhesive: Spread a thin layer of adhesive on the surface using the notched trowel, covering a small area at a time.
    5. Place Tiles: Press each tile firmly into the adhesive, using spacers for consistent gaps.
    6. Check Alignment: Use a level frequently to ensure tiles remain even and straight during installation.
    7. Allow Adhesive to Cure: Let the adhesive set according to manufacturer guidelines before grouting.
    8. Apply Grout: Remove spacers and use a grout float to fill the gaps completely. Wipe off excess grout with a damp sponge.
    9. Cure the Grout: Allow the grout to cure as per the package instructions, typically 24 to 48 hours.
    10. Seal as Needed: Some grout types benefit from sealing to prevent stains and moisture infiltration.

    With these tips, I can confidently tackle my bathroom tile installation and enhance my space.

    Maintenance and Care

    Maintaining bathroom tiles is essential for preserving their beauty and functionality. Proper cleaning and long-term care ensure that my tiles remain in excellent condition for years.

    Cleaning Tips

    I recommend cleaning bathroom tiles regularly to prevent dirt, soap scum, and mildew buildup. For most tiles, a mild detergent mixed with warm water works effectively. I use a soft-bristle brush or a microfiber cloth for gentle scrubbing. For grout lines, a mixture of baking soda and water creates a paste that lifts stains when applied and scrubbed. Avoid using harsh chemicals or abrasive tools, as they can damage tiles. Rinsing with clean water after scrubbing completes the process, ensuring no cleaning residue is left behind.

    Long-Term Care

    Long-term care for bathroom tiles can extend their lifespan significantly. I check for loose or cracked tiles periodically and replace them promptly to prevent further damage. For grout, applying a sealant every 1-2 years helps protect against moisture and staining. I maintain a consistent humidity level in the bathroom using exhaust fans or dehumidifiers, reducing the chance of mold growth. Additionally, I avoid dragging heavy items across the tiles to prevent scratches and chips. Regular attention to these areas keeps my tiles looking fresh and vibrant throughout the years.

    Perfect Fit for your Bathroom

    Choosing the right bathroom tile can truly transform your space into something special. With so many options at Home Depot I’ve found it’s easy to discover the perfect fit for any style or budget. Whether you prefer the classic look of ceramic or the luxurious feel of natural stone there’s a tile out there that’ll meet your needs.

    Don’t forget the importance of color and pattern in your design. By balancing vibrant tiles with neutral accents you can create a cohesive and inviting atmosphere. Plus with the right maintenance tips your tiles will stay beautiful and functional for years to come.

    So go ahead and explore the endless possibilities at Home Depot. Your dream bathroom awaits!

  • Capturing Joy: A Guide to Newborn Lifestyle Photography for Authentic Family Memories

    Key Takeaways

    • Authenticity Over Poses: Newborn lifestyle photography prioritizes genuine moments and natural family interactions over staged poses, reflecting true emotions and the family’s dynamic.
    • Candid Focus: This photography style emphasizes spontaneous expressions and behaviors, capturing daily life with the newborn in a familiar home setting.
    • Lasting Memories: Images from these sessions serve not only as artistic representations but also as a visual history, preserving significant milestones and emotional connections for future generations.
    • Optimal Environment & Timing: Success in lifestyle photography depends on selecting well-lit, clutter-free spaces and timing the session during the baby’s most comfortable periods, like early mornings or late afternoons.
    • Essential Equipment: Photographers should use a DSLR or mirrorless camera, appropriate lenses, and natural lighting to capture images that highlight the newborn’s beauty and authenticity.
    • Thoughtful Editing: Effective post-processing techniques, such as adjusting exposure and maintaining minimal editing, enhance images while preserving their authenticity and emotional depth.

    Capturing the essence of a newborn’s early days has become a cherished tradition for many families. Newborn lifestyle photography focuses on documenting those intimate moments in a natural setting, allowing parents to relive the joy and wonder of their little one’s arrival. This style emphasizes authenticity, showcasing the genuine connections between family members and the unique environment of their home.

    With its candid approach and emphasis on storytelling, newborn lifestyle photography offers a fresh alternative to posed studio sessions. Photographers skillfully blend artistry with emotion, creating images that reflect the love and warmth of family life. As more parents seek to preserve these fleeting moments, this photography style continues to gain popularity, making it a must-have for anyone looking to celebrate their newborn’s journey.

    Newborn Lifestyle Photography

    Newborn lifestyle photography captures genuine moments in a family’s home, focusing on the newborn’s early days. This approach emphasizes authenticity, creating emotional connections for lasting memories.

    Definition And Purpose

    Newborn lifestyle photography involves documenting a family’s everyday life with their newborn. It aims to portray natural interactions, emotions, and the environment surrounding the baby. This style celebrates the bond between family members, making it a favored choice for parents seeking meaningful imagery over traditional studio poses.

    Key Characteristics

    • Natural Setting: Photographs occur primarily at home, showcasing familiar environments.
    • Candid Moments: Photographers capture spontaneous interactions and connections rather than forced poses.
    • Emotional Focus: Images highlight love, joy, and warmth among family members.
    • Subtle Styling: Minimalistic props and soft lighting enhance the authenticity without overwhelming the subject.
    • Documentary Style: Photographers adopt a storytelling approach, chronicling the baby’s first days through a series of relatable images.

    Benefits Of Newborn Lifestyle Photography

    Newborn lifestyle photography offers unique advantages for families wishing to document their early moments together. This approach focuses on authenticity and the genuine emotions shared during this special time.

    Capturing Authentic Moments

    Capturing authentic moments allows families to preserve the true essence of their interactions. Photographers emphasize spontaneous expressions and natural behaviors, showcasing the baby’s personality and the family’s dynamic. Candid images reflect real-life scenarios, such as feeding, cuddling, and playing, which create a more relatable storytelling experience. By documenting these genuine connections, families receive a collection of images that represents their unique narrative.

    Creating Lasting Memories

    Creating lasting memories is a core benefit of newborn lifestyle photography. Images from these sessions highlight significant milestones, such as the baby’s first smiles or family gatherings. These photographs serve not only as artistic representations but also as a visual history for future generations. The emotional depth captured in these images strengthens family bonds and evokes cherished memories every time they are revisited. Unlike posed portraits, lifestyle photographs encapsulate the love and warmth experienced in daily life, ensuring that these memories remain vivid and accessible.

    Tips For A Successful Photoshoot

    Successful newborn lifestyle photography requires careful planning and attention to detail. Optimizing the environment and timing enhances the quality of the photographs.

    Choosing The Right Environment

    Selecting a suitable environment plays a crucial role. Prioritize natural light by choosing a well-lit room, such as a living area or nursery. Look for soft, diffused light coming through windows. Declutter spaces to reduce distractions and highlight the newborn’s presence. Consider including personal elements like family heirlooms, toys, or nursery decor to infuse personality into the images. Ensure safety by verifying that the area is comfortable and secure for both the newborn and family members.

    Timing The Session

    Timing significantly impacts the outcome of the photoshoot. Schedule sessions within the newborn’s first two weeks for optimal flexibility and sleepiness. Focus on early morning or late afternoon, when lighting is softer and more flattering. Be attentive to the baby’s natural rhythms—plan around feeding or nap times to maximize comfort. Allow ample time for breaks and adjustments to capture genuine moments, ensuring the experience remains relaxed for everyone involved.

    Equipment And Setup

    Selecting the right equipment and setting the scene at home are crucial components of successful newborn lifestyle photography. Proper preparation enhances the chances of capturing authentic moments that families will cherish.

    Essential Gear For Photographers

    1. Camera: A DSLR or mirrorless camera with a fast lens allows for low-light performance, capturing sharp images in dim settings. A lens with a focal length of 35mm to 50mm is ideal for intimate portraits.
    2. Lenses: Prime lenses with wide apertures (f/1.8 to f/2.8) create beautiful background blur. They highlight the newborn while ensuring that the background remains soft and unobtrusive.
    3. Tripod: A sturdy tripod provides stability during shoots and facilitates creative angles. It also helps reduce camera shake, especially with longer exposures in low light.
    4. Lighting Equipment: Natural light is preferred, but portable reflectors and softboxes can enhance illumination. They help manipulate shadows and highlight the baby’s features without harsh contrasts.
    5. Memory Cards: High-capacity, fast memory cards prevent interruptions during a session. Photographers should have multiple cards ready to accommodate many shots.
    6. Backup Storage: External hard drives or cloud storage are essential for safeguarding photos. This allows for secure storage of precious memories, ensuring they remain accessible over time.

    Setting The Scene At Home

    1. Choose Natural Light Areas: Identify spaces in the home with ample natural light, such as near large windows. Soft, diffused natural light creates a warm and inviting atmosphere.
    2. Declutter Spaces: Remove unnecessary items from the shooting area. Clean backgrounds focus attention on the newborn, making images feel more intimate and heartfelt.
    3. Incorporate Personal Touches: Add meaningful items like family heirlooms, toys, or blankets. These details personalize the session and reflect the family’s unique story.
    4. Mind the Color Palette: Choose neutral or pastel colors for clothing and surroundings. Harmonious tones create a tranquil environment that enhances the softness of newborn images.
    5. Prepare for Comfort: Ensure the temperature is warm enough for the baby and provide comfortable seating for family members. A relaxed atmosphere facilitates genuine interactions during the shoot.

    Editing And Post-Processing Techniques

    Effective editing and post-processing techniques enhance the aesthetic appeal of newborn lifestyle photography while preserving its authentic essence. These methods play a crucial role in transforming raw images into professional-looking photographs.

    Enhancing Natural Beauty

    Editing software, such as Adobe Lightroom or Photoshop, helps enhance natural beauty without over-editing images. Key techniques include:

    • Adjusting Exposure: Correct underexposed or overexposed images to reveal delicate features and soft skin tones.
    • Color Correction: Enhance colors to reflect the warmth and vibrancy of family life, ensuring that skin tones look natural and true to life.
    • Sharpening Details: Apply slight sharpening to focus on the fine details of the baby’s features and the textures of clothing or blankets.
    • Cropping Strategically: Improve composition by cropping to eliminate distractions while keeping the focus on the newborn and family interactions.

    Maintaining Authenticity

    Maintaining authenticity during the editing process is vital to preserving the genuine emotions captured in lifestyle photography. Important practices include:

    • Minimal Editing: Avoid heavy filters or excessive retouching to keep the candid moments and natural expressions intact.
    • Keeping Props Natural: Ensure any props or styling elements look organic and relatable, enhancing the scene without overwhelming it.
    • Consistency in Editing: Use a consistent editing style across images to create a cohesive narrative that reflects the family’s unique story.
    • Documenting Moments: Prioritize moments that convey raw emotions, ensuring that the editing process supports the story behind each photograph.

    Incorporating these editing and post-processing techniques retains the integrity of newborn lifestyle photography while enhancing its visual appeal.

    Newborn Lifestyle Photography

    Newborn lifestyle photography captures the essence of family life during those fleeting early days. This approach not only highlights the beauty of natural interactions but also preserves the emotional connections that define a family’s journey. By focusing on authenticity and spontaneity, it creates timeless images that resonate with love and joy.

    With careful planning and the right environment, families can ensure their photos reflect genuine moments. The combination of thoughtful setup and minimal editing allows the true spirit of these precious memories to shine through. As more parents embrace this style, newborn lifestyle photography continues to grow, providing a meaningful way to celebrate the arrival of a new family member.

  • Unleash Your Creativity with Magic Clip Art: Enchanting Designs for Every Project

    Key Takeaways

    • Enhancing Creativity: Magic clip art adds a whimsical and vibrant touch to a variety of creative projects, making it an essential tool for artists and designers alike.
    • Versatile Applications: This type of clip art can be applied across multiple mediums, including invitations, social media graphics, and websites, allowing for seamless integration into diverse designs.
    • Popular Themes: Key styles in magic clip art include fantasy themes featuring mythical creatures and nature designs that celebrate the beauty of the natural world, catering to various artistic tastes.
    • Quality Matters: Selecting high-resolution images is crucial for maintaining a professional appearance in your projects, ensuring that the final materials are visually impactful.
    • Purpose and Cohesion: Understanding the specific purpose of a project and ensuring the clip art aligns with the overall theme enhances visual messaging and audience engagement.
    • Experimentation is Key: Mixing and layering different pieces of magic clip art can create unique compositions, offering endless possibilities for individuality in creative works.

    Magic clip art brings a whimsical touch to creative projects, captivating artists and designers alike. With its enchanting themes and vibrant visuals, it serves as a powerful tool for anyone looking to add a sprinkle of creativity to their work. Whether for invitations, social media graphics, or educational materials, magic clip art opens up a world of possibilities.

    In a digital landscape where visuals reign supreme, the right clip art can elevate a project from ordinary to extraordinary. This collection of magical illustrations not only enhances aesthetics but also sparks imagination. As more creators seek unique ways to express their ideas, the demand for high-quality magic clip art continues to grow, making it an essential resource for both professionals and hobbyists.

    Magic Clip Art

    Magic clip art encompasses whimsical and enchanting designs that appeal to a wide range of artists and designers. Artists utilize this type of clip art to enhance creative projects, infusing them with vibrant visuals that resonate with audiences. Designers incorporate magic clip art into materials like invitations, greeting cards, social media graphics, and websites, providing a unique flair that captures attention.

    Magic clip art categories include fairies, mythical creatures, magical landscapes, and cartoonish elements. Each category offers diverse options that cater to different artistic styles, from playful to sophisticated. By integrating these designs into projects, creators can effectively convey themes of enchantment and wonder.

    As high-quality visuals become increasingly essential in the digital realm, magic clip art serves as a crucial resource. Professionals leverage these designs to elevate their work, while hobbyists explore their creativity. The versatility and charm of magic clip art contribute to its growing popularity, making it a staple for anyone seeking to inspire imagination through art.

    Benefits of Using Magic Clip Art

    Magic clip art offers unique advantages for artists and designers. Its captivating visuals and wide-ranging applications enhance creative projects significantly.

    Engaging Visuals

    Engaging visuals capture audience attention and evoke emotion. Magic clip art presents vibrant colors, intricate designs, and enchanting themes, making it ideal for inviting viewers in. Elements like fairies and mythical creatures add a magical touch that resonates with diverse age groups. Use of dynamic imagery ensures your projects stand out in competitive markets, resulting in increased viewer engagement.

    Versatile Applications

    Versatile applications of magic clip art suit various mediums. Designers can incorporate it into invitations, greeting cards, social media graphics, and websites, enhancing the overall aesthetic. Magic clip art adapts to multiple styles, from whimsical to sophisticated, allowing creators to match their brand’s voice. Whether for personal projects or professional work, its flexibility enables easy integration into different designs, amplifying creative possibilities.

    Popular Magic Clip Art Styles

    Magic clip art features diverse styles that appeal to various creative projects. Designers often gravitate toward the following popular themes.

    Fantasy Themes

    Fantasy themes in magic clip art showcase enchanting elements such as fairies, wizards, and mythical creatures. These visuals often reflect vibrant colors and intricate details, adding depth to designs. Artists utilize these themes in projects like book covers, party invitations, and promotional materials for fantasy events. For example, a fairy standing in a moonlit forest can create a captivating focal point for a magical-themed event invitation.

    Nature Designs

    Nature designs in magic clip art celebrate the beauty of the natural world, incorporating elements like flowers, trees, and magical landscapes. These designs highlight rich textures and harmonious colors that evoke tranquility and wonder. Creators often use nature-themed clip art for environmental campaigns, greeting cards, and digital backgrounds. For instance, a serene landscape featuring whimsical trees and sparkling stars can enhance a nature-inspired website or social media graphic.

    Tips for Choosing the Right Magic Clip Art

    1. Identify the purpose: Determine the specific project, whether it’s an invitation, social media graphic, or website design. Tailoring selections to the project’s objectives enhances relevance.
    2. Evaluate style compatibility: Assess if the magic clip art matches the overall theme of the project. Styles can range from whimsical to sophisticated, so ensure consistency in visual messaging.
    3. Check quality and resolution: Prioritize high-resolution images for professional appearance. Low-quality visuals diminish impact and can appear unprofessional in final materials.
    4. Consider color scheme: Align the colors of clip art with existing project palettes. Cohesion in color enhances aesthetics and supports brand identity, especially in commercial designs.
    5. Explore licensing options: Confirm usage rights and licensing agreements. Ensure legal compliance, especially for commercial use, to avoid infringement issues.
    6. Gather feedback: Share selections with colleagues or potential audiences for input. Insights from others can gauge effectiveness and appeal, refining the final choice.
    7. Experiment with combinations: Mix different pieces of clip art to create unique compositions. Layering various designs can produce visually interesting and original results, setting projects apart.
    8. Utilize versatile designs: Choose clip art that can adapt to multiple formats. Versatile options provide added value and maximize usage across various projects, saving time and resources.

    Essential Tool For Artists And Designers

    Magic clip art offers a treasure trove of enchanting visuals that can elevate any creative project. Its versatility makes it an essential tool for artists and designers who seek to capture attention and evoke emotion through their work. With a wide range of themes from fantasy to nature, magic clip art caters to diverse artistic styles and preferences.

    By incorporating these captivating designs, creators can enhance their materials while ensuring they stand out in a crowded digital landscape. As the demand for unique and engaging visuals continues to grow, magic clip art remains a valuable asset for anyone looking to inspire creativity and bring their artistic visions to life.